Last July, the pastor of my church began talking to me about a new program he wanted to start called Family Style. The idea was for a daily devotion time shared by the whole family. Just 15 minutes a day to make a connection between the family and God through prayer and Bible reading would produce lasting benefits for individuals, their families and the church as a whole. I was excited about the idea because most churches I’ve attended have taken over the responsibility of the spiritual training of children that has been abdicated by their parents (especially their fathers). This plan gives parents the tools (Biblical devotional materials), encouragement (reinforced every week at church) and accountability (read on) needed to enable success. Pastor Tim’s desire was to encourage the whole church to participate for one year and to keep track of our progress using dimes and that’s why he was talking to me.
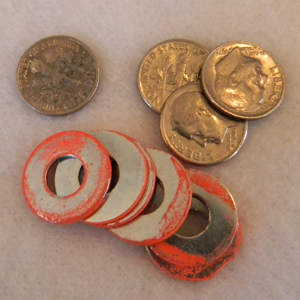
His idea was to have every family bring one dime to church for each devotion they did during the week (up to 5). We would then place those dimes in clear plastic tubes that could be on display at church to show our progress. Washers painted blaze orange (called “wildcards” by Tim) would serve as replacements for missed days (nobody’s perfect). As the display fills with dimes and washers we can see in a tangible way our families growing closer to Christ.
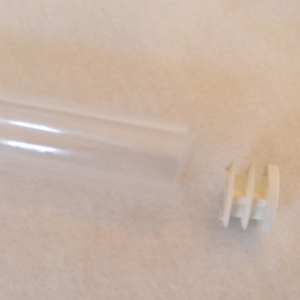
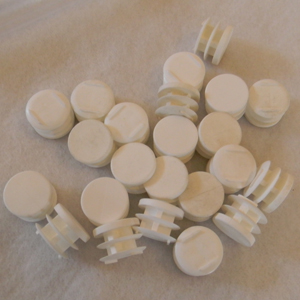
The first question he asked was if I knew where to buy clear plastic tubing in the right size for dimes and something to cap the ends with. I pointed him the the place that has everything, McMaster Carr (www.mcmaster.com). I’ve used McMaster Carr for years as a source for everything from metric fasteners to raw materials to tools. Most of my customers rely heavily on their quick delivery and low quantity requirements. From McMaster, Tim ordered 7 pieces of 1” clear acrylic tubing that were 6 feet long (click here for link). As it turns out, I already had a whole box of white plastic caps that fit perfect in the 3/4” ID tubing (if you send me a note, I will share) but you can also buy them (black color) at McMaster (click here for link).
So with the key materials in hand, my task was to come up with a way to build an interesting display. Here are my first concept sketches. The finished product was simply a refinement of these concepts based upon discoveries and choices made along the way.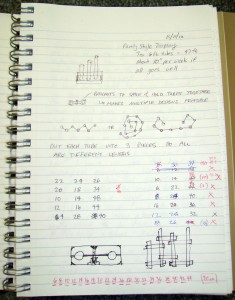
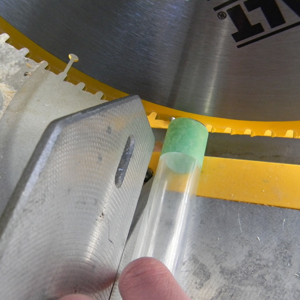
Upon receiving the tubes, I discovered that they were actually a bit longer than 72”. This was a blessing in planning the cut lengths as I could ignore the width of my saw blade in my calculations. After some trial and error, I came up with a cut list resulting in 19 tubes measuring from 6” to 42” in 2” increments. A few pieces leftover could serve as a sample in presenting the idea to others. I used masking tape to protect the tubing as I cut each piece to length with a miter chop saw (my favorite power tool). Be sure to make your cuts quickly as the tubing will melt if you cut it too slowly. Scroll to the end of this post to find a link to the PDF drawing showing a detailed cut list for the project.
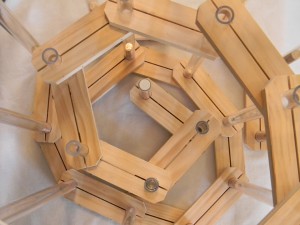
Next I made a quick drawing in SolidWorks to get an idea of how to make the spacer blocks. As you can see from this drawing, each spacer block is made from standard 1 X 3 lumber which measures 3/4” X 2-1/2” and is cut to 9” long. A standard 8′ piece of 1 X 3 can make 10 spacer blocks with only a few inches of waste. This means that I needed 4 sticks of 1 X 3 to make the 36 spacer blocks. Scroll to the end of this post to find a link to the PDF drawing showing detailed plans for the clamp block.
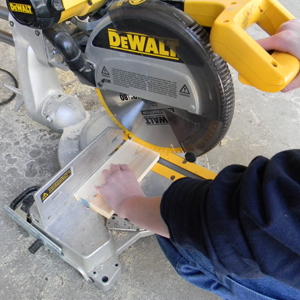
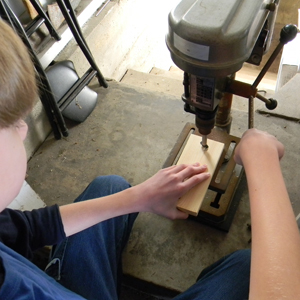
A miter chop saw and a small drill press proved to be the perfect tools for making the spacer blocks. First I setup a stop block to assure that each of my spacer blocks were cut to the same 9” length. Then I set the saw to miter at 45° with an adjustment to my stop block and I cut the corners off of all 36 spacer blocks. Using a 1” Forstner bit and the drill press setup with a simple fixture (made from some of the leftover cutoffs), I drilled the 72 holes in the correct locations (centered 6” apart). I highly recommend using a drill press for this step to assure the holes are straight and parallel to each other (critical feature). After that I used the drill press to drill a pilot hole in the sides of the stop blocks for each clamp screw. I ended up with 2-1/2” deck screws from the local hardware store. They look good and they clamp well (in retrospect, you might consider a shorter screw as some of them broke through ever so slightly when clamped tight). A 1/8” hole for each screw is small enough to assure a good grip on the #10 size screw but large enough to keep the wood from splitting. After drilling pilot holes as deep as I could, I placed the blocks back in the chop saw for the final cut – in half. It’s important after this step to keep the matched halves together so you might consider using masking tape as a temporary tool. Before jumping into the best part of the project, assembly, I recommend placing one half of your clamp block back in the drill press and opening up the 1/8” hole to 3/16”. This guarantees your clamp blocks will actually clamp as the screw will slip through one half and grip in the other.
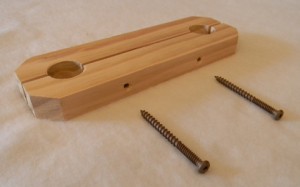
At this point, you may choose to apply some type of finish to your clamp blocks. Paint, wood stain or clear coat are all possible finishes for wood. We chose to keep our clamp blocks “au naturel” so we could move right on to assembly without waiting for things to dry making this a one afternoon project.
On to the best part – assembly. The first step is to cap the bottom of each clear acrylic tube. Push the cap with even pressure against a hard surface to encourage it in. These caps have barbs that hold them well in place so you can be sure that you will not lose a whole tube of dimes in an embarrassing pile on the floor should you decide to move your display (or take it to a convention like Pastor Tim). Next, assemble the clamp blocks with your fastener of choice making sure to leave them a little loose for final assembly. Finally, begin attaching the clamp blocks to the tubes in an alternating fashion, spacing them as you go.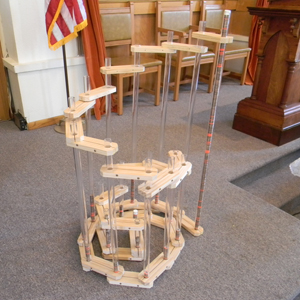
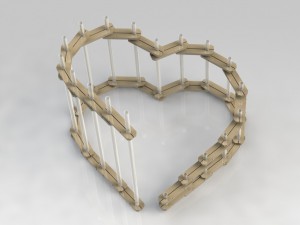
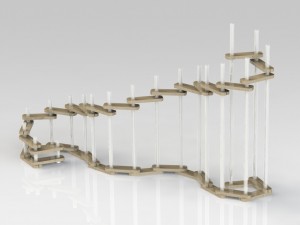
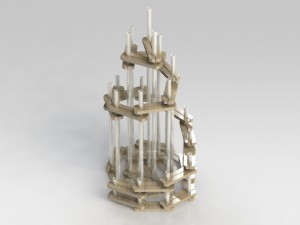
The beauty of this display is that it is fully modular. If you are concerned about the overwhelming task of filling a huge display over a long time, only attach 5 or 6 tubes together at first. Consider alternating the sizes in a random way rather than a steady increasing progression. I found that it is possible to tighten the clamp blocks to a point that the assembly is rigid but it can also be pushed, pulled and twisted into new shapes without adjusting the screws. It’s quite fun to play with the thing to make unique configurations.

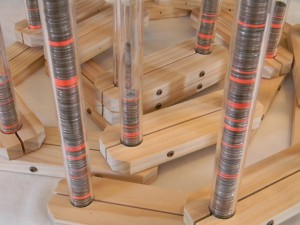
The practical use of our Family Style display is quite remarkable. Every week the kids go up front and place their dimes or orange washers into the tubes. The smallest and largest tubes filled first (Pastor Tim used extra caps to seal them up). The distribution of washers and dimes shows that our church is not perfect (all dimes) nor is it willing to give up (all washers). The display is a constant reminder of our spiritual growth as a church family and a continual encouragement as it slowly fills up each week. And it is fun (the kids keep changing it so it is always different)!
I couldn’t resist doing a few quick designs in SolidWorks for fun. Maybe they will inspire you. Download the assembly and give it a try yourself. If you don’t have SolidWorks 2011, make an announcement at your church and I’m sure you’ll find some engineer nerd like me that is eager to have some fun helping you.
Techincal notes – a dime is about .050” thick so every inch of display will hold 20 days of devotions.
Aside from the Family Style program, this display concept can be used to visibly track any type of growth campaign (good deeds done for the community, days sober/cigarette free/free from ______, fund raising, etc.).
It’s also important to note that this project was an undertaking of my entire family. My kids ran the chop saw and the drill press, assembled the clamp blocks and made several cool variations of the final display. Don’t miss out on this cool opportunity to spend time working with kids!
Here are some things you can download for more info:
McMasterAcrylicTubing.pdf
McMasterPlasticCaps.pdf
ClampBlock.pdf
Tubes Cut List.pdf
HeartAssy3D.pdf (3D pdf’s require newer versions of actobat reader and allow cool 3D navigation – click and drag in the window)
DimeDisplaySW.zip (2M)

